Sunday, February 13, 2011

Chocolate Sheath Cake


Looking for a wonderful Valentine Dessert???
Why not try chocolate cake with chocolate icing???
I love to make this cake, because it seems like I am making something out of nothing. 


These are very basic ingredients...
2 cups sugar
2 cups plain flour
1 teaspoon baking soda
1 cup water
1 stick butter (or margarine)
1/2 cup oil
4 Tablespoons cocoa
1/2 cup buttermilk
2 eggs
1 teaspoon vanilla

Preheat oven to 350 degrees.


I always start by preparing my pan.  I like to use a paper towel and apply a thin layer of Crisco.  Then, I sprinkle a little plain flour in the pan, scatter it around, and shake off any excess.  Today, I am using a 13x9 glass dish, but a metal cake pan will work fine.


Sift the flour, sugar, and baking soda together.  I like to sift mine onto a sheet of waxed paper.  Set aside.


In a saucepan, place the water, oil, margarine, and cocoa.


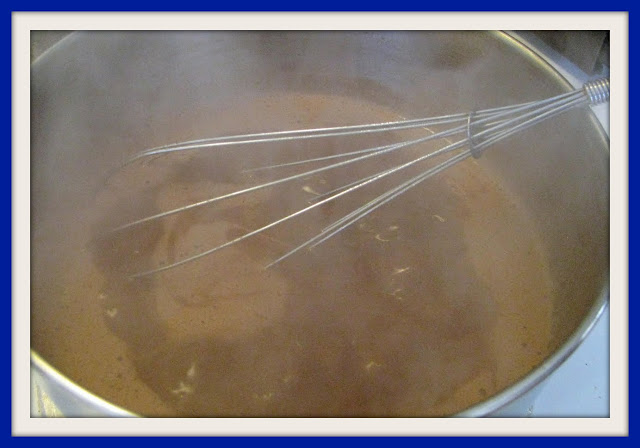
Mix well and bring to a full rolling boil over high heat.
(Be forewarned...this is the stage when everyone in your house will come into the kitchen to see what you are making.  It smells sooooooooo good.)


Slightly beat the eggs together in a bowl, then add the buttermilk and vanilla.  I never have buttermilk at my house.  So, the above picture shows a little trick I do to make buttermilk.  Just add about a half teaspoon of white vinegar to your milk, and you will have instant buttermilk.


Now, slowly add the egg/milk mixture to the chocolate mixture, mixing as you go.  (As you can tell from the photo, I forgot to beat my eggs before adding the milk...do as I say, not as I do.)


Now add in your dry ingredients.


Beat well with a wire whisk.  The batter may appear a little thin.


Pour yummy looking batter into prepared pan.
Then, bake at 350 for 35-40 minutes.


Now, it is time to make the frosting.


FROSTING


This has to be one of the best and easiest cake icings ever.  I make it often, and use it on white cakes, yellow cakes, marble cakes, etc. etc.
 You will need:
1 stick margarine
4 Tablespoons Cocoa
6 Tablespoons milk
1 box powdered sugar


Start by beating the softened margarine with a hand held mixer.  Then, add the cocoa.
(Notice in the above picture, I am trying to do this by hand.  It is not working.  What was I thinking???)


Alternately, add the milk and powdered sugar.


Notice how beautiful this icing becomes as soon as I pull out the hand held mixer.  (What was I thinking earlier????   This is truly an easy icing...almost impossible to mess it up.)


I took this picture of the finished cake in the sun on purpose.  I was just so glad that the sun is shining. No snow for us today...
only sunshine and chocolate cake.


Can I tell you this cake is delicious???
Can I tell you everyone in my house was waiting for a piece???
Can I tell you the smell of this cake baking is heavenly???
I'll just bet you can even smell it just looking at the picture.

Enjoy!!!
Happy Valentine's Day

Friday, February 11, 2011

Easy Monogram

My daughter bought a pack of 3 monogramming initials a couple of months ago.  We immediately came home and ironed one onto her purse.
Cute
Cute
Cute
It has stayed attached with no problem.


There have been two more sitting in the package ever since, so today we finally decided it was time to get out the iron once again.


The pink one found its new home on my daughter's bathrobe.  Not bad.
Now, where to put the green one???


We searched and searched for just the right place to put this last monogram.
My daughter gave up and went to take her shower.
And then, it hit me.
So while she was in the shower, I did this...

Perfect...
I just love it when something is meant to be!!!

Wednesday, February 9, 2011

Sew Your Own Doll

Meet the newest member of our family.
Isn't she just the cutest thing???
Such personality...
Such charisma...
Such gorgeous red hair...


This doll is my daughter's latest sewing project.  It came preprinted with sewing directions included.


You simply cut, pin, sew, and stuff.


The material piece included a dress and hair bows.
This was a great project for my daughter. 


Here is the newly sewn doll wearing her new clothes.
She is just so darn cute.

Monday, February 7, 2011

Chicken Salad

One of my very favorite things is homemade chicken salad.  I usually cook a whole chicken, pull it from the bone, and use part of it for chicken salad and the rest for something else...sometimes chicken and noodles, sometimes a chicken casserole.


The secret to my chicken salad is my Nashville Brother's homemade chunk sweet pickles.  You may remember these from my post on potato salad.


After dicing up my chicken, I add 4 diced boiled eggs.


Next, I add some diced pickle...about 6-7 chunks.  (I also pour in a little pickle juice...maybe a teaspoon.)


I always salt my chicken when cooking it...you could add pepper at this point.
I ploppppppp in some mayonaise.  You'll want to add this to your taste.


Stir together and chill.

There is just something satisfying about knowing there is a bowl of homemade chicken salad in the refrigerator.
Enjoy!!!

I'm linking up with Tidy Mom.  You can check out her blog for some great ideas.


Tidy Mom I'm Lovin It Fridays

Saturday, February 5, 2011

Valentine Decorations

I needed a quick and easy Valentine table decoration for an event we had at our church tonight.  Thanks to Blooming on Bainbridge for this easy idea.  Just a little ribbon, some stem glasses, conversation hearts... and we have instant decorations. 

Wednesday, February 2, 2011

Fried Chicken Tenders

Now that I'm realizing this blog is going to be a great keepsake for my children (especially of my recipes), I have decided to include a few posts showing how I make some of their favorite foods. 

This dish is a favorite for both of my children.

I usually buy boneless/skinless chicken breast and begin by washing the chicken and cutting each breast into 3-4 pieces.  For today's pictures, I actually found the tenderloins a little cheaper.  I still cut some of them a little smaller than they came in the package.


First mix about 1 cup all-purpose flour with about 1/2 teaspoon salt and 1/4 teaspoon pepper.


Each piece of chicken is dipped into a bowl of milk...


Then it is rolled in the bowl of plain flour...


Then it is placed on a piece of wax paper to wait...


When all of the chicken is ready, I heat about an 1/8-1/4 inch of oil in a skillet. (I use canola oil.)  The chicken is then carefully placed in the skillet.  Sometimes I will sprinkle a little seasoning salt on top for a different taste.


I cook the chicken for 3-4 minutes on each side (medium low heat)...turning with a fork when it begins to brown.


I do cover the chicken with a lid as it cooks.  (You know fried chicken tastes better if it is cooked in a really ugly pan with a really ugly lid...no joke.)


Cook for three-four minutes on the other side.


The chicken is then removed to paper towels to get rid of any excess oil.


I have found the secret to delicious chicken is to avoid overcooking it.  This has always been a problem for me, because I want to be sure the chicken is done.  If you cook it just right, it will easily cut with a fork.

I made this meal several days ago...and now I am wishing this was what we were having for supper tonight.  Oh well...

Enjoy!!!

Because I'm loving this fried chicken, I will be linking up with Tidy Mom.


Tidy Mom

Sunday, January 30, 2011

Blue Knitted Hat

Remember my last attempt at knitting a hat.  It was way too small.  If at first you don't succeed...try, try again.

Here is my second attempt:


I used the largest size on the pattern, and it fits my head perfectly.

I promise this is a really easy pattern.  But, somehow I had a difficult time making this hat.  I kept dropping stitches or getting off the pattern, so I took out rows of work at least 3 times.  I really did not think I would ever finish it.

Will I try this pattern again???  YOU BET.  I really like the look of the hat and sewing it together at the end is a breeze.  I just need to pay more attention to what I am doing next time.